|
Listen to This Blog
Getting your Trinity Audio player ready...
|
Disclosure: This post may contain affiliate links, meaning we get a commission if you decide to make a purchase through our links, at no cost to you. Please read our disclosure for more info.
Last Updated on March 20, 2024 by Canny Costumes
If you are looking for a festive design for your nails this Halloween season, but you don’t have the money to dish out at the salon, have no fear!
Nail designs are simpler then you think and can be easily done with products purchased at your local drugstore.
Page Contents
Candy Corn Nails
This is the easiest of the three designs, just requiring a bright orange, bright yellow, and white nail polish. Try and chose high-quality nail polishes such as Rimmel or Opi. You will naturally have to paint several coats to achieve this look, so you want to make sure that the orange color specifically only requires one coat.
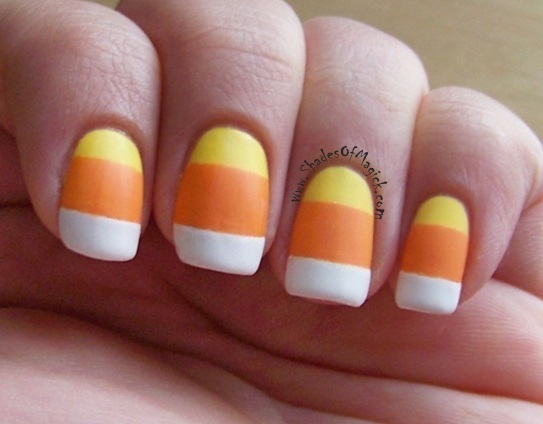
Start by painting each nail in a coat of yellow, and let dry completely. Apply a second coat to make sure the yellow remains vivid. Allow drying completely. Take the orange color, and paint from halfway up the nail to the up. The nail should now be yellow from the base halfway up the nail, and then orange from halfway up the nail to the tip. Allow drying completely.
Once the nail is completely dry, paint a small white strip at the top of each nail. Make it as thick or as thin as you would like. When dry, cover all the nails with a glossy overcoat.
Spider Nails
This design is fairly easy with the right tools. First, you will need black polish. Get a thick black polish that is dark and rich. You do not want a thin see-through black polish for this design. Paint each nail in one coat of the black polish. Allow drying completely. The next step is adding the spiders.
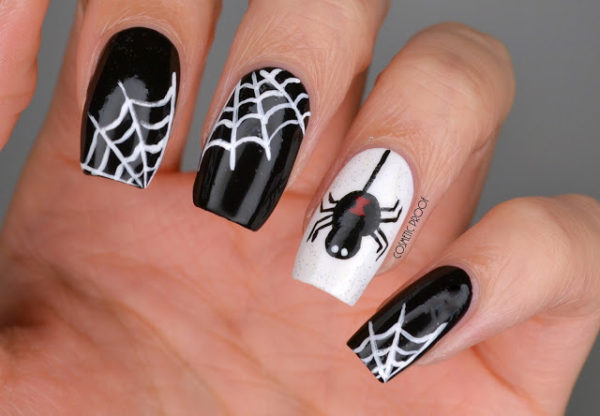
Sally Hansen makes a create nail pen. It comes in the shape of the pin and has polish at the tip to allow you to draw on precise lines. Use a white nail pin to make a small blob on the nail. Allow it to dry completely. Use the pen to add three-four small legs off each side of the blob, so it looks like a spider. Do one to two on each nail, and scatter the placement of spiders on each nail.
Another option is the spider web. Take the black nail, and draw squiggly connecting lines all over the nail to resemble a spider web. Try putting spider webs on your thumbnails and spiders on your other eight nails for a fun way to drive the spider look home. Finish the nails off in a shimmery clear coat to add some sparkle to the look.
Pumpkin Nails
This is the most difficult style of the three, but also the best choice for the office. Remove all polish from your nails, and cover each nail in a clear coat. Once each nail dries, draw an orange oval on the nail, leaving some nail exposed. Make sure to use a high-quality polish that only requires one coat.
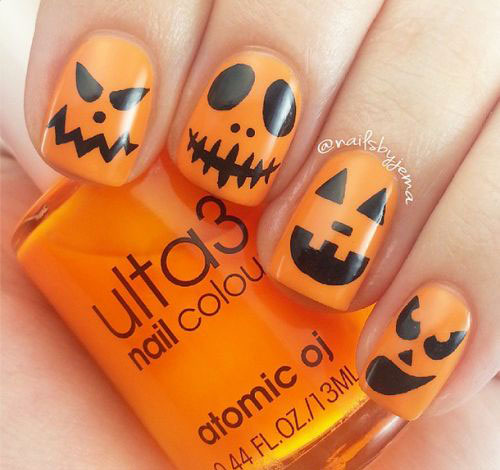
Once it dries completely, use a black nail pen and a green nail pen to draw on eyes, a nose, a mouth, and a stem. There you go! Jack-o-Lantern nails. You can cover the entire nail in orange if you wish, but making small pumpkins on a bare nail is a more professional option.

